Toothpick bridge designs and building tips: bundles, glue, jigs
A toothpick bridge is mostly joints, each holding two or three wooden picks about 65 mm long. These toothpick bridge designs and tips focus on the three things that decide the result: bundled compression members, glue placement and a jig that keeps everything straight.
Toothpick bridge designs: round members and many joints
A toothpick is about 65 mm long, which caps member length unless picks are spliced. Round picks meet at a point rather than across a face, so the glue joint is small and the main design question is how to give each joint more bonded area. Wrap, overlap and layer. A flat-sided pick glues more easily than a round one, but the principle is the same either way.
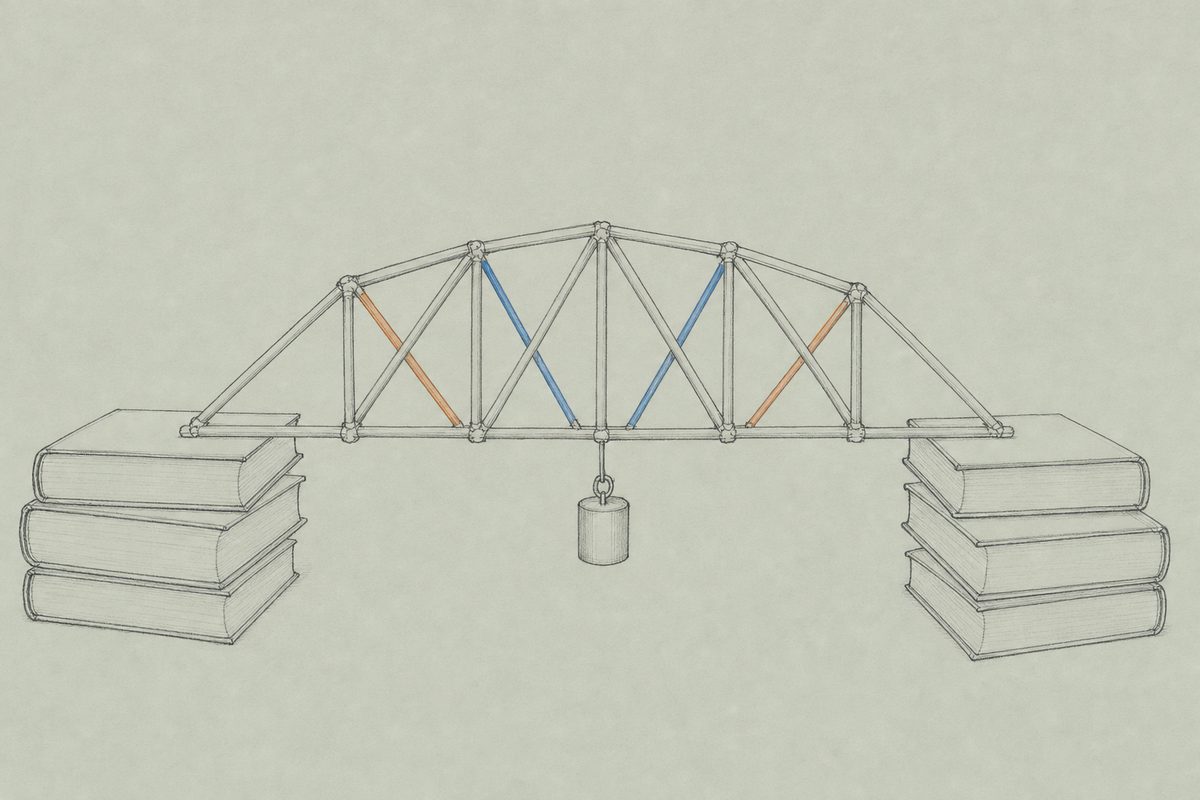
The trusses are the familiar ones. A Warren is the sensible first choice, because most of its members are the same length and picks can be cut and bundled in batches; the truss bridge designs page compares it with Pratt, Howe and K layouts. The forces in a Warren follow the same pattern at any size: the centre top chord carries the full hanging load as compression, the centre bottom chord about three quarters of it as tension, and each diagonal about 0.56 of it. The centre top chord is the member to bundle first.
A toothpick bridge needs more joints than a stick bridge of the same span, since each member is short. Every joint is a place where the glue can be too thin, too thick or misaligned, so keep the number of members low and make each one count.
Laminated bundles for compression members
A compression member that is a single pick will buckle early. Several picks glued side by side buckle later, but only if they are bonded along their whole length.
The arithmetic shows why. Take two flat strips of thickness t and width b, one on top of the other. If they are only laid together, each bends on its own and the stiffness is the sum, 2 × bt³/12. If they are bonded into a single section of thickness 2t, the stiffness becomes b(2t)³/12, which is eight times that of one strip rather than two. Euler’s formula, P_cr = π²EI/L², says buckling load follows that stiffness I directly, so bonding the strips multiplies the load the member can carry by four compared with two loose strips, for the same wood. Round picks follow the same principle, with the numbers depending on how the bundle is arranged.
What goes wrong if the bundle is not bonded: the picks slide against one another when the member bows, each bends separately, and the bundle behaves like the loose picks it is. A dry patch in the middle of a bundle is the usual culprit, so run a thin line of glue the whole length of each contact line and clamp the bundle with tape until it cures. Stagger the ends of the picks in a bundle so that the splice points are not all at one cross-section, which would put a weak plane in the middle of the member.
Glue placement and building a toothpick bridge on a jig
Put glue on the joint only, in a thin even film, and wipe the excess with the tip of a pick. Excess glue adds mass without adding strength, and mass is the denominator of the score.
A jig keeps the picks where you drew them. Draw the truss full size on paper, cover it with a layer of clear tape or baking paper so that glue will not stick to the plan, and tape small anchor strips along the outside of the members so that picks butt against them while the glue sets. The two side trusses are built flat and identical, then joined with cross-bracing in the same way as for a popsicle stick bridge, where the sequence is spelled out in detail.
Let each flat truss cure fully before lifting it off the jig, and let the assembled bridge cure again before it takes a load.
Cutting and gluing carry their own cautions. Craft knives and hot glue guns go to an adult or to supervised hands, and the cutting is done on a mat.
Test it and score a toothpick bridge
Test a toothpick bridge the way any model bridge is tested: rest it on two supports at a fixed span, hang a bucket at the centre, add weight in small steps, wear eye protection, keep hands clear and put a padded catch box under the bridge. Weigh the bridge first. Divide the load at failure by the mass of the bridge to get its efficiency, and write down which member went first.
If a bundled chord buckled, add a second bundle or brace it at mid-length. If a joint pulled apart, enlarge that joint with a wrap of picks across it. The truss bridge designer shows where the largest forces sit before the next set of picks is cut.
Questions5
What is the best design for a toothpick bridge?
A Warren or Pratt truss, built as two side trusses and joined with bracing. Warren has fewer, more uniform members. See the Warren truss page for how the load divides, and use the designer to test a layout before gluing a single pick.
How do I make toothpick bridge members stronger in compression?
Glue several picks side by side into a bundle, bonded along the whole length, and stagger the ends so no joint falls in the same place on each pick. A bonded bundle resists buckling much better than loose picks lying together.
What glue is best for a toothpick bridge?
White PVA or wood glue, applied sparingly. Too much glue adds mass and leaves a stiff, brittle mass at the joint; too little leaves a dry joint. Follow the cure time on the label and wait for it before testing.
How long should a toothpick bridge dry?
As long as the glue label says for full strength, and many white glues need hours rather than minutes, so build one day and test the next. A bridge tested while the glue is still soft fails at its joints and tells you nothing about the design.
How is a toothpick bridge scored?
By load carried divided by the bridge's own mass, so a light bridge that holds a great deal beats a heavy one. Weigh the bridge before the test, and read the efficiency section of the model bridge sheet for worked arithmetic.
Next sheets4
- Popsicle stick bridge the same truss in flat sticks, with a records table
- Model bridge building materials, safe testing and the efficiency score
- Truss bridge designs the four layouts and where each fits
- Truss bridge designer check where the large forces are