File folder bridge designs: build a model bridge from manila cardboard, step by step
A manila file folder costs almost nothing, cuts with scissors and behaves like a real structural material. These file folder bridge designs turn it into a model truss bridge you can build in a few class periods, load until it fails and then improve.
File folder bridge designs: why manila card fails like a real member
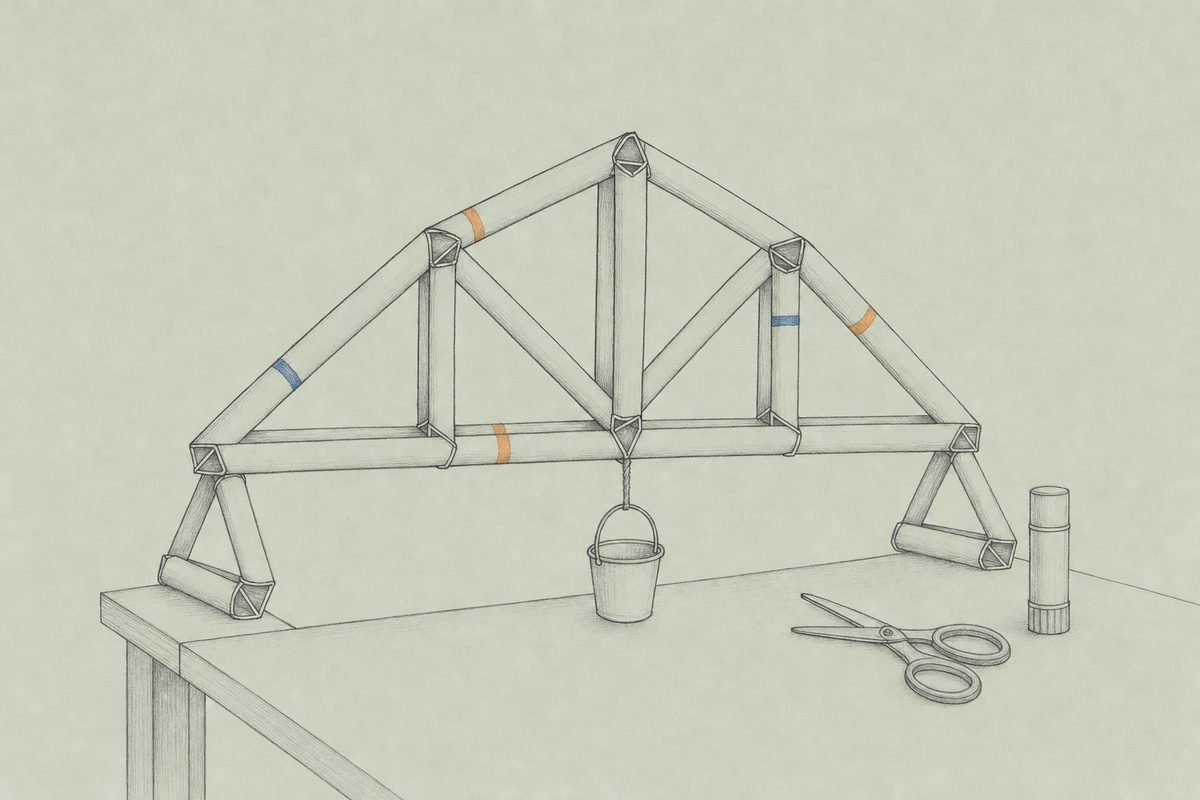
Hang a bucket from a strip of manila card and it holds far more than you expect. Push on the same strip from the ends and it folds in half before you have felt any resistance. That one difference, strong when pulled and weak when pushed, is the reason file folder bridge designs teach structural engineering so well: the card fails the way real members fail, and it fails where the analysis says it will.
A pulled member, one in tension, is limited by the strength of the card and the glue at its ends. A pushed member, one in compression, is limited by buckling, and a flat strip buckles almost immediately. Roll or fold the strip into a tube and the cross-section is spread away from its centre line, which is exactly what buckling resistance needs. A strip 60 mm wide folded in three makes a triangular tube 20 mm on a side, and folded in four a square tube 15 mm on a side. Either way the same card stands up to a load that would crumple it flat.
Anyone asking how to build a bridge step by step should start by picking one of the standard bridge designs, not by inventing a shape. Because forces in a determinate truss depend only on its shape and the load, not on what it is made of, the picture from the truss bridge designer carries straight over to cardboard. The members that glow cool in the designer are the ones that need tubes.
Build a model bridge step by step
The order matters more than the dimensions. Pick a span the whole class can handle, 400 to 600 mm is comfortable on a desk, and follow the same sequence every time. It is the short answer to how to build a bridge step by step with only card, glue and scissors.
- Choose the layout. A four-panel Warren or a six-panel Pratt keeps the member count low. Draw it full size, one of the classic bridge designs, on a sheet of paper with every member as a line, and mark the joints. A layout printed from a PDF must come out at 100% scale, and a viewer such as Adobe Acrobat Reader has an “actual size” print option for that.
- Fold the members. Cut strips from the folders, fold each into a tube, glue along the overlap and let the glue cure. Compression members, every member the designer shows in cool colours, get the tubes; pulled members can be two or three layers of flat strip glued face to face.
- Cut the members to length. Lay each over its line on the drawing, cut it, and flatten about 15 mm at both ends so it can lie against a gusset plate.
- Make gusset plates. Small triangles or squares cut from the folder, glued on both sides of every joint. Most failures start at a joint, so be generous here.
- Build two side trusses flat. Work directly over the drawing, with a sheet of baking paper between card and drawing so the glue never sticks to it. Let each side dry completely.
- Join the sides. Stand the two trusses upright and tie them together with a deck and with cross-braces between the top chords. Without the bracing a perfectly good top chord buckles sideways.
- Weigh the bridge. Write the mass down before any testing. It is half of the score in the next section.
Model bridge building project: test the members first
Before committing to the bridge, test two samples of your own material. This is the part of a model bridge building project that students remember, because the numbers come from their card and their glue rather than from a table.
Hang weights from a strip and add them in small steps until it tears or the glue lets go; that gives the tension strength of one strip. Stand a tube of the same card on end, lay a light board across the top and add weights until it crumples, with eye protection on and a catch box under the test; that gives the compression strength of a tube. Repeat with a flat strip and compare. Record the results in a table of three columns: sample, load at failure, how it failed.
Then read the designer’s numbers for the layout you chose. If the force in the top chord is twice the force in the end diagonal, the tube in the top chord needs about twice the capacity, and now you know how many layers that takes.
Test the bridge, then change one thing
Load the finished bridge at the centre joint with a bucket, adding water or sand in small, equal amounts, and stop at the first sound of cracking. Wear eye protection, because card and glue can spring. Record the load, weigh the bridge and divide: the load carried per gram of bridge is the fairest measure of a design, since any bridge can be made stronger by making it heavier.
Then change exactly one thing. Double the tubes in the member that failed, or move a gusset plate, and test again. The cycle is always build, test, change one thing. The popsicle stick bridge page shows the same cycle with a different material, and the model bridge overview compares all three.
Questions5
How to build a bridge step by step from file folders?
Draw the truss full size on paper, fold card strips into tubes and cut them to length, glue the ends flat onto gusset plates laid over the drawing, build two side trusses, join them with cross-bracing and a deck, then load the bridge in small steps until it fails.
Why fold the card into tubes instead of using flat strips?
A flat strip in compression buckles under a very small push. Folded into a square or triangular tube the same card resists buckling many times better, so tubes go where members are pushed and flat strips can stay where they are only pulled.
Which truss is best for a file folder bridge?
A Warren or a Pratt truss with four to six panels is the best first model. Both have simple triangles, few members and a clear load path. See truss bridge designs for how they differ.
How strong is a model bridge made of file folders?
A flat strip in compression gives way almost at once, while a folded tube carries many times that load. The exact figures depend on the folder and the glue, so test one strip and one tube with hanging weights before building and read the failure points from those tests.
What is a good model bridge building project for a class?
Give every team the same span, the same number of folders and the same glue, then rank the bridges by load carried divided by the bridge's own mass. The class contest page gives a rules template.
Next sheets5
- Model bridge building sticks, toothpicks and cardboard side by side
- Truss bridge designs pick a layout before cutting card
- Truss bridge designer see the force in each member first
- Popsicle stick bridge the same ideas in wood
- Classroom bridge design contest rules and scoring for a class